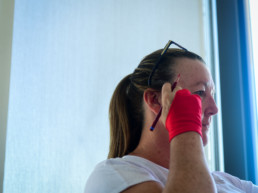
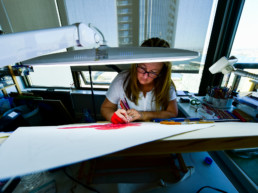
What do I want to draw?
It all starts with inspiration. I have to feel something to really draw. I travel with my family quite a bit (non covid times) and I take thousands of photos. Even when I’m not traveling I fill my camera phone with images that inspire me. Each one made me feel something. I use my iPad to view and manipulate the photos into the layout I want to begin with. My subjects vary from landscapes to animals to babies to beautiful flowers to old rusty objects. There really isn’t a rhyme or reason to the reference photos I take.
Basic Line Drawing
Next I begin to put the basic outline and layout on paper. I use a projector or transfer paper to enlarge images and lay down the basic line drawing…..that way I concentrate my efforts on the details. I enjoy working on the basic design layout making sure I have a good focal point and balance and hopefully have edited out the distracting elements before I begin with color. Once the line drawing and layout is how I want it, I move on to the next step…
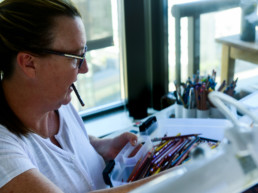
choosing colors and base layers
Color. If you haven’t noticed, I LOVE color. The brighter the better. I can’t always be as bold as I want when I’m doing an animal commission, but if I can I use tons of vibrant color. . Colored pencil artwork is built upon many, many layers. I lay down the light colors first to preserve them. Then I add the base color of the fur, skin, sky, etc. I work on adding the basic values of light to dark before I begin with too much detail. The only difference is when I’m working on an animal. If I’m drawing an animal I start with the eyes before doing to much else. To me the eyes are where the soul of the animal lies. If the eyes aren’t drawn correctly then the entire image won’t work.
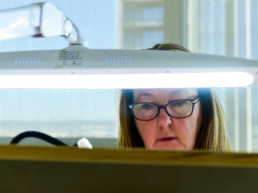
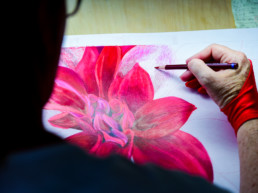
deeper values and beginning detail
Color Exploration. This step I work on the colored layers beginning to add in detail and values. This is where I get into a “zone” and my hands just take over. I refer to my reference images often and work on these layers moving all around the piece. I work overall values and move area to area rather than completing one square at a time. For me I see the whole image begin to take shape. I set the drawing up and step back to evaluate my progress. I also take pictures on my phone and look at those. It is rather amazing the distance and clarity that I get from viewing my progress through the phone. This is the longest step as many, many, many layers are added.
KEEP GOING
By now there is a little bit of color and some basic detail all over the picture. This is the point where most people would call it quits. Well, not the colored pencil artist. As I said before, colored pencil drawings are made upon many layers. Values (darks and lights) are gradually built up as layers of color are added on top of each other. For larger areas it is this point that I use odorless mineral spirits and sometimes a colorless blender to smooth out the color into the crevices of the paper. Some styles leave the white “tooth” of the paper to show through but I rarely do. If white is put down on the paper first, then mineral spirits will wipe away any color and get back to clean white. This step is what gives the drawing a “painted” look. The color is pushed into the crevices of the paper to smooth out the color and deepen it. Then I just keep going. I put the drawing up on a ledge a few feet away to get some perspective and look at what areas of the picture need more work. Then I keep going…..
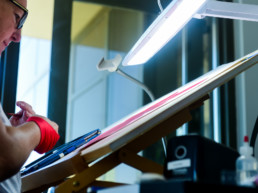
More details
Details & Tweaking – Most of the drawing is done at this point so I concentrate on getting intimate details onto the drawing. Many of my drawings are photorealistic and details distinguish this style and bring the drawing to life. Lots and lots of tiny steps and evaluating come to play. I concentrate on one small area at a time, enlarging the reference photo and comparing it to my drawing. I look for small details, shapes, color, and anything that makes if look real. Values come into play here and the darks get darker, the lights get lighter, the tiny specks of color most people would miss are added. Lots of progress photos on my phone. I often share these steps on my social media pages. As an artist I love to follow other artists and see their processes. I hope my process can help someone else out too. I enjoy feedback as well. My husband and daughter are my biggest fans and also give me the most honest critiques. Gotta love ’em!
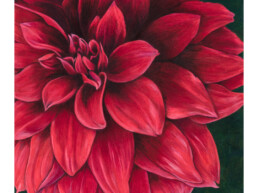
finishing touches and evaluation
Once I feel the drawing is done I tape the picture up on a wall in my house and look at it for a few days. I let it sit and I walk by and take the image in. I look at it and look at it. After a few days I really know if it is done or if I need to add more tweaking. I repeat this process until I feel it is truly done. Then I spray the piece with uv archival spray, take it to the printers to be captured digitally, and then it gets matted and framed to be hung in its forever home.
Classes and workshops coming soon!
Now forming an interest list. If you would like to learn professional pencil coloring techniques, send me a quick note and I will add you to the list. You will be one of the first people to hear about upcoming classes and workshops.
CONTACT ME
Email Me: info@kjonesart.com
Call Me: (951) 252-4802